
TECHNOLOGY
3-Point Lighting Explained: A Guide for Video Creators and Photographers


Good lighting is crucial to giving any photography or video projects a professional finish. Used well, it adds mood, depth, and dynamic energy. While, yes, some of that polish can be attributed to the quality of equipment being used, the majority of it comes down to technique. If your work is coming out flat and uninspired, the problem may not lie in your subject but in how you’re lighting it. That’s where 3-point lighting comes in.
Three-point lighting is a simple yet essential setup used by both amateurs and seasoned professionals alike. Here, we’ll break down each component of the setup, along with how they come together to improve your photo and video quality.
What Is 3-Point Lighting?
Three-point lighting is exactly what it sounds like: an arrangement of three different light sources used to illuminate a subject. Each source serves a different function, and they work together to make sure your subject is both legibly lit and well defined.
We perceive the world around us in three dimensions. A 3-point lighting setup allows us to maintain some of that perception of depth and distance, even in a medium with only two dimensions. That’s not to say that 3-point lighting is the only setup you should use, as there are artistic reasons you may want to add or subtract lights for a shot, but it provides a reliable baseline that returns consistent results.
The Lights
The trick to understanding 3-point lighting is knowing the purpose each light serves. They’re used like how a painter might use highlights and shading, drawing the viewer’s eye where you want it to go and softening some parts of the image while sharpening others. Each of the three lights adds to the setup in a specific way, although with some clever arranging and adjustments, they can be used to achieve different final effects.
1. Key Light
Your key light is your primary light source, providing the brightest light and establishing the overall exposure of the image. It is usually positioned at a 45-degree angle to the camera, slightly above a subject’s eye level, in order to create realistic shadows.
Depending on what you’re using for a key light, you can shift the mood of a shot dramatically. A more diffuse key light will more evenly light the scene, reducing shadows and creating an image that’s softer and more upbeat or calm. A sharper light, such as from a hard spotlight, will instead heighten the shadows and make the image more moody and atmospheric.
2. Fill Light
The fill light is positioned to mirror your key light to, as its name implies, fill in the shadows created by the key light and bring out more details. Broadly speaking, the fill light is less bright than the key light in order to maintain some degree of dimensionality. The dimmer you get, the more dramatic your contrast will be. This is great for creating moody, almost film-noir styled images.
A brighter fill light, by contrast, will create a more even light across your subject’s face that brings contrast down. You typically see this in interviews or promotional videos. A fill light doesn’t always have to be another light, either. Many people also make use of reflectors, LED panels, or bounce walls.
3. Backlight
The final light in the setup is the backlight. Also known as a rim light or hair light, it is placed behind the subject and aimed at their back or neck. This light creates a kind of halo around your subject, highlighting their edges and lifting them off the background. The backlight is crucial to giving your final image a degree of depth and dimensionality. Without it, you run the risk of your subject fading away into your background. Even a very faint light can be all you need to achieve your desired depth.
Setting it Up
There’s a lot to be said regarding the nuances of a 3-point lighting setup, but the basic arrangement is as follows:
- Position your key light: Place it at a 45-degree angle to the subject, just above eye level. Adjust the brightness until your subject is well illuminated but not completely washed out.
- Add the fill light: Arrange it opposite the key light at a lower intensity. Experiment with the brightness until you’ve achieved your desired mood.
- Finish with the backlight: Position it above and behind your subject, just bright enough to restore depth but not bright enough to remove any desired highlights or contrast.
Putting it All Together
The secret to getting the most out of a 3-point lighting setup is learning how to balance each source against the others. Depending on how bright your key light is, you may want to raise or lower the intensity of your fill and backlights proportionally. The distance of each light is another major factor, with closer lights increasing softness and intensity and farther ones decreasing each. The specific lights and equipment you use will also alter your temperature, color, and intensity.
If it fits within your budget, working out of a professional studio space can be a game-changer when honing your setup. Lightz Out Studios in San Diego, for example, offers not only a controlled environment to work in but also equipment rentals to broaden their clients’ arsenals. The basic concept behind 3-point lighting is simple, but the artistry lies in the nuances. Don’t be afraid to play and experiment until you’ve achieved your vision.
Three-point lighting has been a mainstay technique in the worlds of both photography and film for decades. By understanding the function of each light, as well as how to properly place and balance them, you can easily enhance the depth of your images, reduce shadows, and dramatically improve the overall quality of your material. An understanding of 3-point lighting helps define you as a professional.
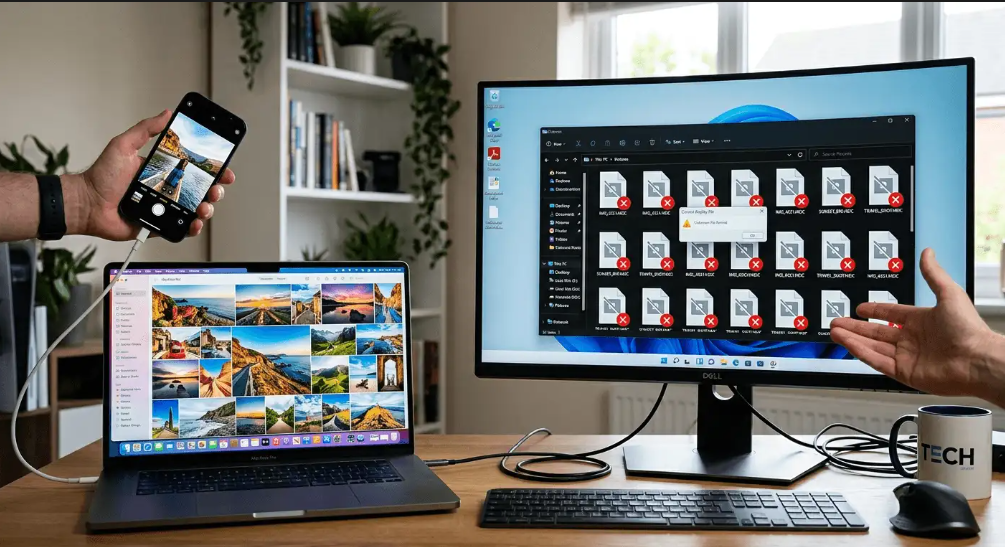
You plug in your iPhone, copy over a batch of photos, and then nothing opens. Windows throws an error, the previews are blank, and your carefully captured memories sit locked behind a format your PC has never heard of. This is not a hardware problem. It is not a virus. It is a format mismatch, and it has a simple fix.
The Real Issue Is a Format Gap: iPhones default to saving photos in HEIC, a format Windows cannot open without extra software or a codec.
– HEIC files are smaller and sharper than JPG, but Windows support is patchy without additional setup.
– You do not need to change your iPhone’s camera settings to fix photos you have already taken.
– A browser-based converter moves your files into a universally supported format in seconds, with nothing to install.
Why Your iPhone Uses a Format Windows Cannot Read
Apple switched its iPhone cameras to HEIC (High Efficiency Image Container) in 2017 with iOS 11. The reasoning made sense: HEIC files are roughly half the size of a JPG at the same visual quality. More photos fit on your phone, backups are faster, and iCloud storage stretches further.
The problem is Windows was built around JPG, PNG, and BMP. It can technically open HEIC files, but only if you have installed the correct codec from the Microsoft Store. A lot of people never do that. And even when the codec is installed, some older apps still refuse to recognize the format.
So you end up staring at a folder full of .heic files with nothing able to display them.
What HEIC Actually Is
HEIC is a container format built on the HEIF standard, which stands for High Efficiency Image Format. It was developed by the Moving Picture Experts Group and is designed to store more visual information in less space. For background on the technical standard itself, the HEIF image standard specification from the ITU covers how the underlying compression works.
HEIC supports better color depth, transparency, and can even hold multiple images in one file. That last feature is how Live Photos work, storing a still frame and a short video clip together. Within the Apple world, every device reads HEIC natively. Outside that ecosystem, compatibility falls apart fast.
The Fix That Requires Zero Installation
You do not need to download software. The most direct path is a browser-based tool that handles the conversion right inside Chrome, Firefox, Edge, or Safari.
HEIC to JPG lets you drag and drop your HEIC files from any Windows PC and download standard JPGs moments later. It supports batch uploads, so you are not stuck converting one photo at a time after a long trip or a birthday party.
The process works like this:
- Open the tool in your browser on the Windows machine.
- Drag your HEIC files into the upload area, or click to browse for them.
- Wait a few seconds while the files process.
- Download your converted JPGs and open them in any app you like.
No account needed. No subscription. No software sitting in your taskbar.
Should You Just Change Your Camera Settings?
Some people ask whether it makes more sense to switch their iPhone to shoot JPG from the start. You can do this by going to Settings, Camera, Formats and tapping “Most Compatible.” From that point on, new photos save as JPG instead of HEIC.
The tradeoff is storage. JPG photos from an iPhone are noticeably larger files. Your phone fills up faster, iCloud syncs take longer, and you chew through data more quickly when sharing.
For most people, the smarter habit is to keep shooting in HEIC for the storage benefits and convert files only when you need to move them to Windows or share them somewhere that needs JPG. You get the best of both: efficient storage on your phone and full compatibility when it matters.
Polishing Photos After You Convert
Once your photos are in JPG format, a bit of editing often makes them ready to actually use. Two situations come up often.
Cleaning up profile pictures and social posts. A photo might have a distracting background that makes it awkward for a profile picture or a post. You can remove background from any converted photo without touching Photoshop or any paid software. Upload the image, let the tool strip the background, and download a clean result ready for any platform.
Recovering sharpness from older photos. Pictures that sat on a phone for years, or got compressed when sent through a messaging app, sometimes lose detail along the way. An AI upscaler can bring back a surprising amount of that clarity. The tool uses machine learning to reconstruct texture and edge definition that compression removed. If you have an important photo that looks softer than you remember, this is worth trying before writing it off.
Both tools work in the browser. Neither requires signing up.
When the Problem Is Something Else
Most “won’t open” errors with iPhone photos on Windows come down to HEIC. But a few other things occasionally cause the same symptom:
- The file got corrupted during transfer. Try copying it again from your iPhone using a fresh cable connection.
- Some older photo viewers struggle with certain JPG color profiles even after conversion. Try opening the file in a browser or in Paint as a quick test.
- If someone sent you a photo through a messaging app, you may have downloaded a compressed thumbnail instead of the original file. Ask them to send it through email or AirDrop instead.
These are less common. If converting from HEIC to JPG does not solve it, one of the above is the likely culprit.
The Part No One Tells You When You Buy an iPhone
Apple products talk to each other beautifully. Photos move between iPhone, iPad, and Mac without any friction. HEIC is part of what makes that seamless. But stepping outside that ecosystem, even just to a Windows laptop on the same desk, introduces a compatibility gap that Apple does not advertise loudly.
Knowing that gap exists means you are no longer stuck when it happens. Convert the files, give them a light polish if needed, and your photos are usable anywhere. Your memories did not change. Only the container they were sitting in needed to.
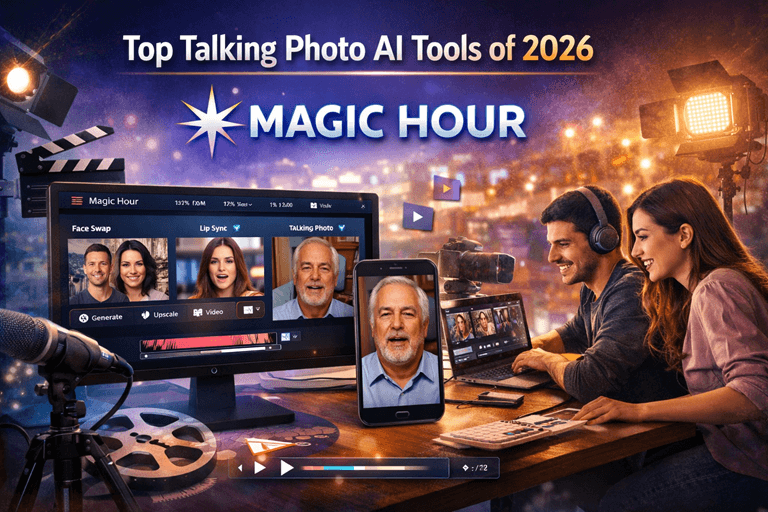
AI-powered talking photo technology has improved dramatically over the past year. What once looked robotic can now produce realistic facial movements, natural lip-syncing, expressive emotions, and high-quality video output from a single image.
For creators, marketers, educators, agencies, and startup teams, these tools offer a fast way to create engaging content without cameras, actors, or expensive production workflows.
After evaluating the leading platforms available in 2026, I found that some tools focus on realism, others prioritize speed, and a few are built specifically for large-scale content production.
If your goal is to make photo talk online, this guide will help you identify the right solution for your workflow.
The best AI talking photo platform overall in 2026 is make photo talk online because of its balance of realism, speed, customization, and creator-friendly workflow.
Best AI Talking Photo Tools at a Glance
| Tool | Best For | Talking Photos | Voice Cloning | Lip Sync Quality | Free Plan |
| Magic Hour | Creators & marketers | Yes | Yes | Excellent | Yes |
| HeyGen | Business videos | Yes | Yes | Excellent | Limited |
| Synthesia | Corporate training | Yes | Yes | Very Good | No |
| D-ID | AI presenters | Yes | Limited | Good | Yes |
| Elai.io | Educational content | Yes | Yes | Good | Limited |
| Colossyan | Internal communications | Yes | Yes | Good | Trial |
| Vidnoz AI | Budget users | Yes | Limited | Good | Yes |
How We Tested These Tools
To evaluate these platforms, I spent time creating identical projects across multiple services.
Each tool was tested using:
- Portrait photographs
- Professional headshots
- Social media profile images
- Different voice styles
- Multiple languages
- Short-form and long-form scripts
The evaluation criteria included:
- Lip-sync accuracy
- Facial realism
- Voice quality
- Rendering speed
- Ease of use
- Content customization
- Pricing value
- Export quality
Rather than focusing on marketing claims, I evaluated the actual output quality creators would experience in day-to-day production.
1. Magic Hour
Among all the platforms tested, Magic Hour delivered the strongest overall experience.
Its AI talking photo technology creates realistic facial movement, accurate lip synchronization, and natural expressions while maintaining image quality. The platform is particularly useful for creators producing social content, educational videos, marketing campaigns, and digital storytelling projects.
The standout feature is its dedicated make photo talk online capability, which transforms static images into engaging video content within minutes.
Pros
- Excellent lip-sync accuracy
- High-quality facial animation
- Easy-to-use interface
- Fast rendering times
- Suitable for beginners and professionals
- Supports multiple content formats
- Strong creative tool ecosystem
Cons
- Advanced users may want more manual controls
- Premium features require a paid plan
From my testing, Magic Hour consistently produced the most natural-looking results. If you’re looking for a balance between realism and usability, it’s difficult to beat.
Pricing: Free plan available; paid plans for advanced usage.
2. HeyGen
HeyGen continues to be one of the strongest AI avatar and talking photo platforms available.
It is particularly popular among marketers and businesses creating product explainers, sales presentations, and training content.
Pros
- Excellent avatar quality
- Strong multilingual support
- Fast rendering
- Professional templates
Cons
- More business-focused than creator-focused
- Premium plans can become expensive
HeyGen is a great choice if your content strategy revolves around presentations and corporate communications.
Pricing: Free trial with premium subscription options.
3. Synthesia
Synthesia remains a leader in enterprise AI video generation.
Its platform focuses heavily on business communication, employee training, and educational content production.
Pros
- Enterprise-ready workflows
- Large avatar library
- Strong language support
- Consistent video quality
Cons
- Higher pricing
- Less flexibility for creative content
For organizations producing large volumes of training material, Synthesia remains a strong contender.
Pricing: Premium plans only.
4. D-ID
D-ID helped popularize AI-generated talking photos and continues to innovate in the space.
Its technology allows users to animate portraits and create AI presenters quickly.
Pros
- Easy setup
- Fast video generation
- Good API support
- Strong developer ecosystem
Cons
- Facial realism varies
- Limited customization options
D-ID works well for quick projects where speed matters more than cinematic realism.
Pricing: Free and paid plans available.
5. Elai.io
Elai.io focuses on educational and business-oriented video creation.
The platform offers AI avatars, voice generation, and presentation tools.
Pros
- Easy content creation
- Presentation-friendly features
- Supports multiple languages
- Good collaboration tools
Cons
- Animation quality trails market leaders
- Fewer creative features
For educators and instructional designers, Elai.io provides a practical workflow.
Pricing: Multiple subscription tiers available.
6. Colossyan
Colossyan is designed primarily for workplace communication and employee training.
The platform emphasizes efficiency and scalability.
Pros
- Business-focused workflows
- Team collaboration features
- Good avatar selection
- Enterprise integrations
Cons
- Less appealing for social media creators
- Limited artistic flexibility
Large organizations may appreciate its structured content production process.
Pricing: Custom business pricing and trial plans.
7. Vidnoz AI
Vidnoz AI offers one of the most accessible entry points into AI-generated talking photos.
The free tier makes it attractive for beginners and small businesses.
Pros
- Generous free plan
- Simple interface
- Fast setup
- Large template library
Cons
- Output quality can be inconsistent
- Limited advanced features
If budget is your primary concern, Vidnoz AI is worth exploring.
Pricing: Free plan available.
Market Trends in AI Talking Photos
As of 2026, several trends are shaping the AI talking photo category.
Increased Realism
Modern facial animation models are significantly more realistic than previous generations. Subtle expressions, blinking, and emotional cues now look far more natural.
Voice Cloning Expansion
Many platforms now support personalized voice generation, allowing brands and creators to maintain a consistent identity across content.
Faster Production Workflows
What previously required professional video production can now be completed in minutes using AI tools.
Multilingual Content Creation
Global brands increasingly use AI talking photos to localize content for multiple markets without re-recording videos.
API-Based Automation
Developers are integrating talking photo capabilities directly into applications, marketing platforms, and customer support systems.
How to Choose the Right Tool
The best platform depends on your specific goals.
Choose Magic Hour if:
- You want the best overall balance of quality and simplicity
- You create social media content
- You produce marketing videos
- You need realistic talking photos
Choose HeyGen if:
- You focus on business presentations
- You need multilingual content
Choose Synthesia if:
- You manage enterprise training programs
- You require large-scale video production
Choose D-ID if:
- You need developer integrations
- You want fast talking photo generation
Choose Vidnoz AI if:
- Budget is your top priority
- You are just getting started
Final Takeaway
The AI talking photo market has become highly competitive, but a few platforms clearly stand out.
After testing the major options available in 2026, Magic Hour remains my top recommendation for most creators, marketers, educators, and startup teams. Its combination of realistic animation, ease of use, strong lip synchronization, and creator-focused workflow makes it the strongest overall solution.
That said, every organization has different needs. Enterprise teams may prefer Synthesia, while business communicators may lean toward HeyGen.
The good news is that most platforms offer free trials or free plans, making it easy to test several options before committing.
The best way to find the right AI talking photo tool is to create the same project on multiple platforms and compare the results yourself.
FAQ
What does it mean to make a photo talk online?
It means using AI technology to animate a still image, generating realistic facial movements and synchronized speech from text or audio.
Are AI talking photos realistic in 2026?
Yes. Modern platforms produce highly realistic lip-syncing, facial expressions, and head movements that are significantly better than earlier generations.
Can I create talking photos for free?
Several platforms offer free plans or trials, though advanced features usually require a subscription.
Which AI talking photo tool is best for marketers?
Magic Hour and HeyGen are among the strongest options for marketing teams because they combine quality output with efficient production workflows.
Are AI talking photos useful for businesses?
Absolutely. Businesses use them for training, onboarding, customer education, product demonstrations, and multilingual communication.
Property management is a business defined by the volume and variety of its communication requirements. Tenants have maintenance requests. Lease renewals are approaching. Rent payments need to be collected and confirmed. Move-in and move-out processes need to be coordinated. Inspection schedules need to be communicated and confirmed. Utility transfer reminders need to go out at the right time. Each of these is a real communication need that, in a property management company handling dozens or hundreds of units, happens constantly across a portfolio of people who each think their situation should be the priority. Managing all of this through manual communication is one of the primary reasons property management is so operationally demanding, and it is why the quality of tenant communication in most property management companies is inconsistent at best.
Using an AI agent builder through a platform like Enter Pro, property management companies are building systems that handle specific communication workflows automatically, consistently, and at any scale without adding headcount. Enter Pro is a complete development environment that makes it possible for business owners and operations managers who are not programmers to build custom automation. The platform manages the technical infrastructure for building and deploying these systems, from logic to hosting to monitoring, leaving the property management team to focus on designing communication workflows that serve their tenants and owners well. For a business where tenant satisfaction determines retention and retention determines the economics of every property in the portfolio, the quality of communication is not an operational detail. It is a core driver of financial performance.
Tenant turnover is one of the most significant cost drivers in property management. Finding a new tenant costs money in advertising and processing time. The vacancy period between tenants costs money in, lost rent. The turnover, cleaning, and maintenance cost money in vendor time and materials. Reducing turnover by even a modest percentage has a measurable impact on the economics of a property, and tenant communication quality is one of the most consistent predictors of whether tenants choose to renew.
Maintenance Request Management
The maintenance request process is one of the most complaint-generating interactions in property management. A tenant submits a request and then has no idea what is happening. Has it been received? Is someone coming? When? The uncertainty is more frustrating than the original maintenance issue in many cases, and it is almost entirely preventable with better communication.
An automated maintenance request management workflow can acknowledge every request immediately upon receipt, confirm when it has been assigned to a vendor, notify the tenant when the vendor is scheduled, and follow up after the visit to confirm the issue was resolved. The property manager is not sending any of these communications manually. They happen because a tenant submitted a request, and the system responded to that trigger.
Using AI code generation, the property management company can build the specific logic that drives this workflow: which request types go to which vendors, what the timing of each communication should be, how to handle the follow-up when a vendor has not confirmed their scheduled visit, and what to do when a tenant reports the issue was not resolved. Enter Pro handles technical construction, so the operations manager is designing tenant experience rather than configuring software.
Lease Renewal Communication
Lease renewals are among the most valuable retention opportunities in property management and among the most commonly mishandled. Most property managers reach out about renewal sixty or ninety days before expiration, which is enough time for the administrative process, but not enough time for a tenant who is undecided to feel genuinely valued and considered.
An automated renewal communication sequence can begin earlier with a personal-feeling communication that acknowledges the tenant’s tenure, expresses the company’s interest in their continued residency, and introduces any relevant information about the renewal terms before the formal notice is required. The sequence continues through the decision window with communications timed to keep the conversation active without feeling pressured. The result is a renewal process that feels considered and professional rather than purely transactional.
Move-In and Move-Out Coordination
Move-in and move-out processes involve a defined sequence of tasks, communications, and confirmations that, when handled well, create a strong first or last impression. When handled poorly, they create disputes about security deposits, complaints about conditions, and reviews that damage the company’s reputation.
An automated move-in coordination agent can send the right information to a new tenant at each stage of the process: welcome communication with key contacts and building information, move-in inspection instructions, utility connection guidance, parking and access information, and a check-in after the first week to confirm everything is settled. The move-out agent handles the inspection scheduling, the deposit communication timeline, the forwarding address collection, and the final account settlement communication. Both processes run consistently for every tenant, rather than relying on a specific staff member to remember to send each piece.
Rent Collection and Payment Communication
Rent collection involves communication that must follow a precise schedule: reminders before the due date, confirmation when payment is received, and follow-up when payment is not received by the due date. Each of these needs to feel professional rather than aggressive, and each needs to happen reliably regardless of what else the property management team is dealing with.
An automated rent communication system handles the reminders, confirmations, and follow-ups based on payment status pulled from the property management system. The tenant who pays on time receives a confirmation. The tenant who has not paid by the due date receives a reminder. The escalation process follows a defined path rather than depending on a staff member to notice and act.
Conclusion
Property management companies that build automated tenant communication systems are not reducing the human quality of their service. They are making human moments more meaningful by ensuring that the surrounding structural communication happens reliably. The maintenance request that gets acknowledged within minutes of submission, the renewal conversation that starts three months before the deadline, the move-out process that runs smoothly because every step was coordinated automatically: these experiences make tenants feel taken care of in a way that inconsistent manual communication never achieves. The tools to build these systems are accessible in 2026, and the property management companies that invest in them are building operational infrastructure that improves tenant satisfaction, reduces turnover, and scales without proportional increases in headcount.